Converting artwork to vector format is an essential skill for designers, artists, and anyone involved in digital art and printing. Vector graphics offer unmatched scalability, precision, and clarity, making them ideal for various applications, from web design to large-scale printing. However, the process of convert artwork to vector can be tricky, and there are several common mistakes that can affect the quality and usability of your final vector file.
In this blog, we’ll explore some of the most frequent mistakes made during the conversion process and how to avoid them to ensure your artwork remains crisp, clean, and true to its original form.
1. Ignoring the Importance of High-Quality Source Material
The first mistake many people make when converting artwork to vector is starting with a low-quality or poorly scanned image. A raster image with low resolution or visible pixelation will result in an inaccurate or messy vector conversion. Since vectorization involves tracing over the original image, any imperfections in the source material will be amplified in the final vector file.
Solution: Always begin with the highest quality version of your artwork. If you’re working with a hand-drawn piece, scan it at a high resolution (300 dpi or higher). Ensure that the image is clean and free from unnecessary marks, smudges, or noise before converting it to vector format.
2. Over-Simplifying or Over-Complicating the Path Structure
When converting artwork to vector, the goal is to create smooth, clean paths that replicate the original design as closely as possible. Some designers make the mistake of either creating too few paths, resulting in a simplified and inaccurate image, or too many paths, leading to a file that’s overly complicated and difficult to work with.
Solution: Strike a balance between simplicity and detail. Most vectorization software, such as Adobe Illustrator or CorelDRAW, allows you to control the number of paths during the conversion process. Start by experimenting with different settings to see which best captures the details of your artwork without over-complicating the design. Clean up unnecessary anchor points afterward to ensure smoothness.
3. Failing to Use Proper Layering Techniques
Another common mistake is converting complex artwork into a single-layer vector file. This not only makes the vector file difficult to edit later but also increases the likelihood of mistakes when attempting to adjust individual elements of the artwork.
Solution: Use layers effectively during the vectorization process. For example, separate different elements of the artwork—such as the background, foreground, and intricate details—into distinct layers. This will make it easier to edit and manage each part of the design without affecting the overall composition. Using layers also simplifies the process of changing colors or adjusting individual elements in the future.
4. Overlooking Line Thickness and Detail in the Original Art
In hand-drawn or detailed artwork, the thickness of lines and level of detail play a significant role in how the final piece looks. When converting to vector, designers often overlook these subtle differences, which can lead to a final product that looks either too thick and clunky or too thin and faint compared to the original artwork.
Solution: Pay close attention to the line thickness and detail of the original artwork. Adjust the stroke weight and line thickness after converting the file to vector to ensure it matches the look and feel of the original. Many vectorization tools allow you to control the thickness of strokes, so take time to make the necessary adjustments.
5. Neglecting to Check for Smoothness and Accuracy
After converting an image to vector format, you may notice that some areas of the design, particularly curves and edges, appear jagged or uneven. This is often due to an automatic conversion process that fails to accurately capture the smoothness of the original artwork. Jagged lines can diminish the quality of the artwork, especially when scaling for print or larger displays.
Solution: After conversion, use the smoothing tools in your vector software to fine-tune the curves and edges of the design. In programs like Illustrator, the “Simplify” tool can reduce unnecessary points and smooth out jagged edges without losing the integrity of the design. Always zoom in to inspect the finer details and correct any irregularities before finalizing the vector.
6. Forgetting to Adjust Colors Properly
One of the most overlooked aspects of converting artwork to vector is color handling. Some designers assume that the software will perfectly translate colors from the original raster image, but this is not always the case. Failing to adjust the colors post-conversion can result in dull, inaccurate, or inconsistent shades.
Solution: Double-check the color palette after converting the artwork. Vector software often allows you to adjust individual colors manually, so take the time to fine-tune them to match the original artwork as closely as possible. Use Pantone colors or other industry-standard color libraries to ensure consistency across different media, especially if the design is intended for printing.
7. Not Saving the File in the Right Vector Format
After spending time perfecting your vector conversion, the last thing you want is to save the file in the wrong format or overlook the importance of file compatibility. Many beginners mistakenly save their vector files in raster formats like JPEG or PNG, which defeats the purpose of creating a vector file in the first place.
Solution: Save your final artwork in the appropriate vector format, such as SVG, EPS, or AI. These formats ensure that your artwork remains scalable and editable. If the file needs to be used in different software or platforms, confirm that the chosen format is compatible with those programs.
8. Not Testing the Scalability of the Vector File
One of the main reasons to convert artwork to vector is its scalability, but not testing this feature is a common mistake. Designers might assume that their vector file is perfectly scalable without actually enlarging or reducing it to check for inconsistencies or flaws.
Solution: Before finalizing the vector file, test its scalability by enlarging it significantly (e.g., for a billboard or banner) and reducing it to a much smaller size (e.g., for a business card). Ensure that the artwork retains its clarity and sharpness at both sizes, making any necessary adjustments to paths, lines, and details for better scalability.
9. Overlooking File Size Optimization
Vector files, especially those with many complex paths, can sometimes result in large file sizes, which can be difficult to handle and slow down your workflow. Failing to optimize the file size can create issues when sharing or uploading the artwork for web or print use.
Solution: Simplify the vector file by removing unnecessary points, reducing the number of layers where possible, and using fewer complex shapes. Many vector editing tools offer file optimization options that can reduce the file size without compromising the quality of the artwork.
10. Relying Solely on Auto-Trace Features
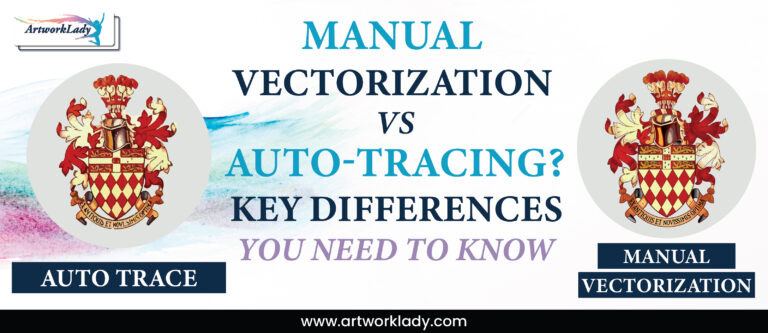
While auto-trace tools in vector software can quickly convert artwork, relying solely on these features without manual refinement can lead to inaccuracies, loss of detail, and poor-quality results. Auto-trace often produces more points than necessary, creating a complex and less efficient vector file.
Solution: Use auto-trace features as a starting point, but always refine the results manually. Clean up unnecessary points, smooth curves, and adjust details by hand to ensure the final vector matches your artistic vision.
These are the common mistakes that often occur during vector art conversion. Avoiding these pitfalls will help you achieve a high-quality vector file that accurately represents your original artwork and meets your needs.
At ArtWorkLady, we specialize in providing high-quality vector conversion services, ensuring your artwork is accurately and professionally transformed into scalable, editable vector files. Whether you’re looking to convert hand-drawn illustrations, logos, or complex designs, our team is dedicated to delivering precise, polished results.Visit ArtWorkLady to learn more about how we can help you bring your artwork to life in vector format. Don’t let common mistakes compromise your design—trust ArtWorkLady for expert vector conversions!


